Ремонт, зображення, каталог запасних частин, вся інформація яка потрібна для ремонту бензопили Husqvarna 120 II
DIY wooden sandbox
The sandbox is definitely one of the main and most important components of the playground. This is a place where children of different ages spend a considerable amount of time. Most often, sandboxes are built of wood. This is due to the fact that plastic products are not so durable, and metal surfaces are too cold, which is not always useful for children. Therefore, a wooden sandbox with your own hands is certainly the best option.
Types of sandboxes for children
For children's toys, clothing, inventory, special requirements are made. Safety comes first. Convenience and aesthetics are also important. Children's sandbox is not an exception, during its construction you need to adhere to certain rules.
There are different types of wooden sandboxes:
- Prefabricated - are built from several parts.
- Integral - monolith.
- Open - under the open sky, without a canopy, without a cover.
- Sandboxes with a canopy.
- Wooden sandboxes with a bottom.
- Sandboxes without a bottom.
Children's sandboxes from wood: description
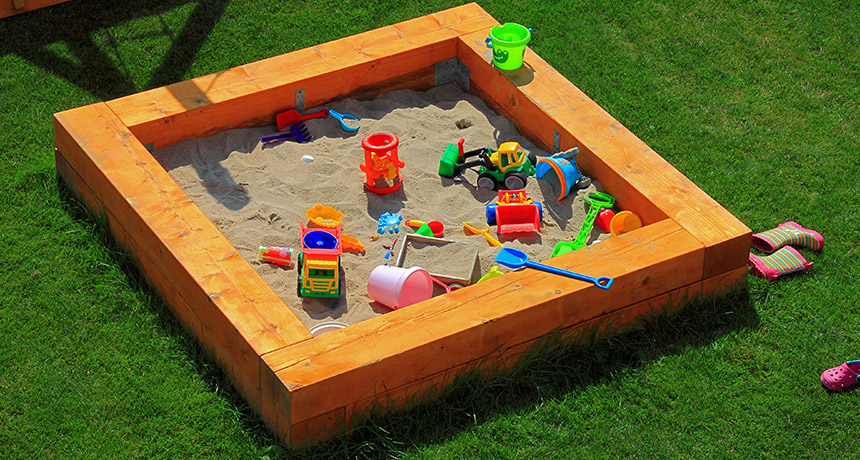
Wood sandboxes are mainly built using natural wood or plywood. The first option is more desirable, as it guarantees a long service life. Products made of plywood can save money, since plywood can be bought at a low price, but at the same time, the service life is poor.
It is possible to extend the life of wood products by treating them with water-repellent paint. All paints and varnishes used are subject to special safety requirements, as children will come into contact with them.
The main advantages of wooden sandboxes: environmental friendliness, durability, do not heat up in the sun.
The disadvantages include the need for regular painting, susceptibility to decay.
With regards to painting, it has its advantages. Each year, you can change the style of the sandbox, experimenting with drawings, with color.
What is needed to build a sandbox
If you decide to build a wooden sandbox on your own site, you can buy lumber of excellent quality at a low price in our online supermarket wood.ua.
For the construction you will need:
- drawing of the finished sandbox;
- boards, whetstones;
- self-tapping screws;
- Sander;
- paints and varnishes;
- gravel;
- sand.
To begin with, you should clearly define the shape and dimensions of the future sandbox and execute its drawing on paper. If the sandbox is made only for one child, you can not increase its dimensions too much.
A square structure with a side length of about 1-2 m will be quite enough. For several children, a sandbox will be needed more spacious. The height of the side should be about 38 cm. So that cats, dogs or other animals do not litter in the sandbox, it is worth designing and constructing a special cover for it. It is best to make such a cover in the form of two separate leaves, so that children have the opportunity to independently open and close it.
The main stages of the construction of the sandbox
Next, you should choose a place on the site to place the sandbox. It is not recommended to equip it too far from home. With this arrangement, it will be difficult for you to see children playing through the window and watch them. It is also not recommended to place the sandbox under the crowns of trees. Litter of birds and shadow throughout almost the entire daylight hours are not the most pleasant background for children's games.
After all the preparatory steps described above have been completed, you can proceed directly to the construction of the sandbox. Boards must be marked and sawed in such a way as to obtain pieces of the required length or buy boards of the desired length with the desired cross section on wood.ua.
For the construction of the lid, tongue-and-groove boards or plywood are perfect. After this, the lumber must be treated with a grinding machine.
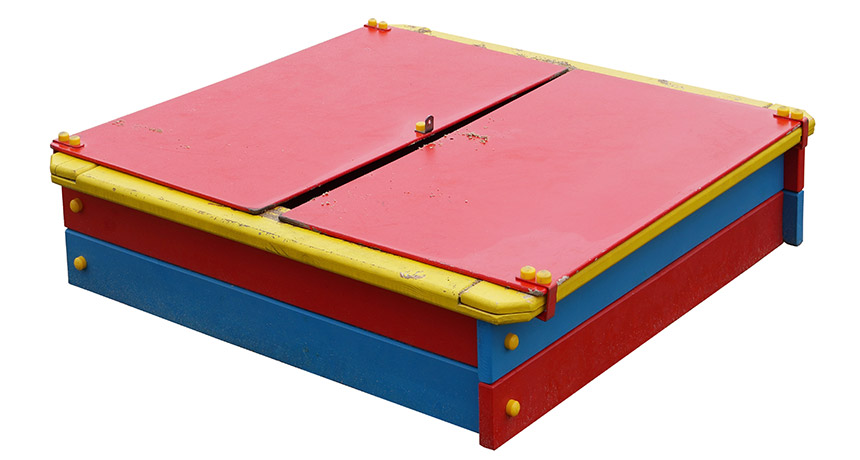
Next, the assembly of the product. It must be made exclusively on a flat surface. Bars are placed in the corners, and the boards are fixed with screws. Nails are not recommended.
After this, it is necessary to prepare the soil (cut off the top layer and fill the resulting area with gravel). The resulting “cushion” of gravel will prevent weeds from growing in the sandbox and at the same time provide an outflow of excess moisture from it.
Well, at the last stage, the sandbox is installed. To do this, it is enough just to slightly deepen the bottom of the boards and bars into the ground, paint the product, fill the sand. It is best to use thoroughly washed river sand.
We create beauty and coziness by decorating the sandbox
It is best to create multi-colored compositions using bright colors on a wooden base, canopy, on the lid. This procedure will require a minimum of effort and maximum imagination.
Ideally, involving children in painting the sandbox. It will be interesting for a child to draw paints on a tree on his own. As decorations, not only flowers, animals, birds are recommended, it is also worth drawing letters, numbers.
Rules for caring for a sandbox made of wood
Do not think that having built a sandbox, you can only admire how children play in it. It requires constant attention and regular care. This will ensure safety and extend the life of the product.
The rules are not complicated, the main thing is to adhere to them:
- We check and clean the sand, removing debris from toys, branches, stones and other garbage.
- If the sand level has dropped significantly, add a new one. Sand for backfilling should always be in stock.
- Once a year, sand is recommended to be replaced completely.
- Every spring, with the onset of heat, we paint wooden sandboxes, covers and awnings.
Regardless of which sandbox will be installed on the site, it will definitely bring joy to children, improve health and contribute to the development of thinking. The main thing is that the child is safe and comfortable to play!





Facebook comment